Showing posts with label Christmas. Show all posts

Friday, December 24, 2010

The Dolls House

before

This has been a long time coming!

Well over a year ago I purchased a wooden dolls house while out "treasure hunting" one day. It had just come in to the store and the price on it was only $10. The house wasn't a flash one and to look at it, it seemed to have been well loved by it's previous owner. The curtains, wall paper and flooring choices told me that it had probably been made a very long time ago and I'm sure it was made with lots of love. It was the perfect project for the parents of two little girls!

So I took the house home and it sat and sat...and sat down under the house just collecting dust but recently we decided it was time to give the dolls house a make over, ready to give to our girlies for Christmas. We have spent many hours downstairs painting and sanding and doing more painting while the girls slept - the house had to be pink, Miss M's favourite colour! We purchased the groovy furniture and a little family online and made little curtains and here it is....

....our labour of love - the dolls house.

after

Wednesday, December 22, 2010

Keep Your Cards


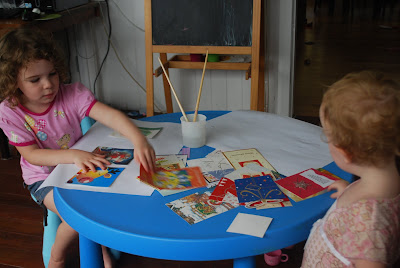
At Easter time we save shiny egg wrappers to use in our art and craft and at Christmas time we save our Christmas cards to use in all kinds of Christmas fun, the following year. This craft is just a simple Christmas collage using Cel Mix glue (or glue sticks) and the pictures from the fronts of cards. Too easy!

Tuesday, December 21, 2010

Angel Art


I hope you don't mind if am a proud mummy for a moment....

Miss M (4.3) was asked to paint a canvas as part of a display of children's artwork telling the true story of Christmas. Her painting now hangs on the gallery wall of our church amongst a line up of other beautiful paintings. How excited was I!! I had to remember that I wasn't the one commissioned to do the art!! She was so excited too and thought it was wonderful to be asked. As she painted she said, "I am a real artist Mummy!"

Miss M's part of the story was the angel Gabriel telling Mary that she was going to have a baby. Her painting is the first you can see on the left. She used acrylic washable paint and some gorgeous starry glitter to make her painting light and bright. (from the glow of the angel)

Monday, December 20, 2010

Our Nativity


In amongst the madness that surrounds Christmas there is a story that quietens our hearts and makes us think about the true meaning of Christmas - God sending his Son to earth as a baby on that first Christmas.

As a family we try to focus much of our Christmas time celebrations and activities around Jesus birthday and for some time now I've wanted a nativity set to help us do this. A beautiful ornate one on top of a shelf would be lovely but I also wanted one that my girls could interact with. In my days as a carer in child care I would make a toilet roll nativity to bring this story to the kids and last year SquiggleMum posted about the toilet roll nativity her family had made. It inspired me to make one again. So, throughout last week we began creating our very own family nativity together. We had toilet rolls, cotton wool and paper everywhere! Since then, each night as bedtime stories begin, the girls have retold the Christmas story using the little figures. This has been a very special time.

You may like to make a toilet roll nativity with your family so I suggest you head over to SquiggleMum to see how they made their gorgeous one.

We've placed our nativity under the tree with the presents surrounding, so it's a great reminder to us that Jesus is definitely the best gift at Christmas. He brings us love, hope, an inner peace and joy!

Thursday, December 17, 2009

Chocolate Balls


'Tis the season for doing a little bit of baking but here is a recipe that doesn't require any baking at all.

Chocolate Balls

You will need...

8 Weet-bix
1 tin condensed milk
2 tbsp cocoa
2 tbsp coconut
Extra coconut for rolling

Crush the 8 Weet-bix in a bowl.
Add the condensed milk, cocoa + coconut.
Mix until all the ingredients are combined.
Using your clean hands make balls from the mixture and roll them in the extra coconut.
Refrigerate until firm.

These chocolate balls are great to put out on the Christmas table. They are so easy to make that older kids will have a ball making them all by themselves and littlies will have some messy fun giving them a go with the help of an adult.

Jingle all the way....celebrate Jesus' Birthday!

Wednesday, December 16, 2009

Christmas Stockings


We may not get a snowy cold Christmas where we need a fireplace with stockings hanging by it but it's still fun to decorate the house with some stocking decorations. Your littlies can make these very simple stocking decorations themselves.
Stockings

You will need...

  • Stocking cut-out - I make a template so I can trace and cut as many as I like but you could also draw one and then photocopy.

  • Red paint - acrylic, water or Cel mix however I like to use Cel mix as it is glue and paint in one. If you don't have Cel mix you could add some glue to your paint

  • Cotton wool balls

Draw a stocking on a piece of cardboard and cut out the stocking shape.

Have your kids paint the stocking red. (or any colour really, depending on what your Christmas theme is)

Place cotton wool across the top.

There you have it, some lovely Christmas Stockings. Now they can be hung up for everyone to enjoy.

Jingle all the way....celebrate Jesus' Birthday.

Wednesday, December 9, 2009

Mini Chocolate Christmas Puddings


I have a cousin who is a bit older than me and when we were kids I remember looking up to her a great deal. One Christmas on the farm she taught me the new version of 'Away in a Manger' and I thought that was the coolest thing ever. (Did we say coolest in the 80s?) Last year she shared a great idea for Christmas and I thought it was the coolest thing ever. I think I still look up to her a bit! I thought I would share her recipe with you. I'm not sure who created this idea in the first place but it's just so cute and is the perfect thing to take to a Christmas party....as long as it's in the air con.

Marshmallow Christmas Puddings

You will need...
  • Arnott's Dark Royals Biscuits - they have a biscuit base, a marshmallow inside and dark chocolate coating - YUM!

  • White chocolate melts

  • Green snake lollies or mint leaf lollies

  • Red Mini M+M's

Melt the white chocolate over a double boiler or in a microwave - you won't need a lot, just a 1/4 of the packet will do.

Using a teaspoon put the white chocolate on the top of the Royals Biscuits - see picture.

Add a Red Mini M+M to the top middle of the biscuit.

Cut leaves out of snakes or mint leaf lollies - I used kitchen scissors to cut thin triangular pieces out of the snakes.

Add two of the little leaf shapes either side of the M+M. The biscuits should look just like little Christmas puddings now.

Refrigerate until the chocolate sets and then enjoy.

You can package these up individually to be gifts or just present them on a lovely platter. Thanks to my very cool cousin for this great recipe idea - you're still the best!


Jingle all the way....celebrate Jesus' Birthday!

Monday, December 7, 2009

Sparkly Christmas Play Dough

If you're anything like me you may have at least one batch of play dough in the fridge at all times ready for a spur of the moment or planned activity. The girls and I love all kinds of play dough colours and when we use the powder paints to make our dough the colours are incredibly rich and vibrant. At Christmas time we choose to have red or green play dough - this year it's red. Here's a Christmas twist to an old favourite activity.

Sparkly Christmas Play Dough

You will need...
  • Play dough - Follow the directions on a McKenzie's Cream of Tartar container, found in the baking aisle of the supermarket
  • Glitter - we found beautiful silver glitter with tinsy tiny stars in it - so beautiful!
  • Christmas play dough cutters - you can find these at kitchen stores, department stores and cheap shops
  • Rolling pin

Make a well in the centre of a ball of play dough.

Knead the dough until the glitter is mixed through = sparkly play dough.

Have fun making all kinds of Christmas shapes with your rolling pin and cutters. This dough is perfect for Christmas stars and angels!

You can be as creative as you like. Why not try and create a Christmas nativity scene?

Jingle all the way....celebrate Jesus' Birthday!

Saturday, December 5, 2009

Stamp It Christmas Wrapping Paper


Making your own Christmas wrapping paper can be so easy and so cheap plus the kids will have a whole heap of fun creating it. This is one idea we use to make colourful paper for our gifts...

Stamp It Christmas Wrapping Paper

You will need...
  • Paper - we use either white easel paper or butcher's paper. You could also do it on brown paper which is very cheap to buy and will wrap plenty of presents.
  • Paint - we used Cel mix this year but you can also use acrylic paint which actually gives a better print. (Time for me to buy some acrylic paint!)
  • Kitchen sponges
  • Trays or plates - I used washed/ clean meat trays.
  • Stampers - read the end of this blog to find similar ideas. I purchased our Christmas stampers from an art supply place.

Set up trays with paint covered sponges on them. We had red, green and yellow paint. I like to put a different colour on each.

Press a stamper onto the sponge to cover it in paint and go for it! Stamp the stamper all over the paper until you are happy with your design.

Hang your wet wrapping paper out to dry.

Once dried, wrap your Christmas presents in your lovely new wrapping paper and decorate with a gift tag and bow. They'll look fantastic!

If you don't have Christmas Stampers you could...
  • use Christmas cookie cutters OR
  • make stampers out of potatoes - cut Christmas shapes in potato halves.

Jingle all the way....celebrate Jesus' Birthday!

Friday, December 4, 2009

Paper Plate Christmas Wreaths


Here's a very simple craft that your littlies can make for the Christmas Season.

Paper Plate Christmas Wreath

You will need...

  • Paper plates
  • Paint - Cel mix is great because it is paint and glue in one. I like to do green paint but you could also do another colour such as gold or silver. If you don't have Cel mix, mix a little PVA glue into some acrylic paint.
  • Holly berries - red cardboard circles
  • Holly leaves - green leaf shapes cut out of cardboard
  • Hole punch
  • Ribbon
Cut the centre out of a paper plate.
Use the outside piece as the wreath.
Have the kids decorate it with paint/ glue, the berries and the leaves.
Once dried, punch a hole in the top, tie some ribbon through and hang your wreath on the door.

I hope your little people will be as proud as mine was when they see their Christmas creation hanging on the door. As we drove out the other day Miss M said, "Thank you Mummy". I asked her what for and she replied, "For hanging my Christmas thing on the door!"

Jingle all the way... celebrate Jesus' Birthday!
Check out www.squigglemum.com for three more wonderful paper plate wreath ideas.

LinkWithin

Blog Widget by LinkWithin